
Honeywell RTH8500D Thermostat Manual: A Comprehensive Guide
This manual offers detailed guidance for the Honeywell RTH8500D programmable thermostat, covering installation, operation, troubleshooting, and accessing support resources.
The Honeywell RTH8500D is a 7-day touchscreen universal programmable thermostat designed for optimal home comfort and energy savings. This thermostat provides users with intuitive control over their heating and cooling systems. ManualsLib confirms its availability with downloadable PDF user manuals, offering comprehensive instructions.
This guide serves as a dependable resource for operating and maintaining your RTH8500D. It details everything from initial setup to advanced features like Smart Response and Vacation Mode. Understanding its functions ensures efficient use and maximizes benefits. The thermostat’s quick installation guide (M39436) simplifies the setup process, while the full operating manual (69-2220EF-05) provides in-depth explanations.

Key Features and Benefits
The Honeywell RTH8500D boasts a user-friendly touchscreen interface, simplifying programming and adjustments. Its 7-day programmability allows for customized schedules tailored to your lifestyle, optimizing comfort and reducing energy consumption. Smart Response technology learns your heating and cooling patterns for faster comfort.
Key benefits include Vacation Mode for energy savings during absences and Filter Change Reminders to maintain system efficiency. The thermostat supports universal applications, ensuring compatibility with various systems. Access to downloadable manuals (PDF) from sources like ManualsLib provides extensive support. This thermostat offers a reliable and efficient solution for home climate control, enhancing convenience and lowering utility bills.
Package Contents & What’s Included
The Honeywell RTH8500D package typically includes the RTH8500D 7-Day Touchscreen Universal Programmable Thermostat unit itself, alongside a mounting baseplate for secure installation. Essential hardware, such as screws and wall anchors, are provided for a straightforward setup process. A Quick Installation Guide (M39436) is included to assist with initial wiring and mounting.
While a detailed owner’s manual is often available for download online (ManualsLib), a printed version may or may not be included. You’ll likely need standard wiring tools – a wire stripper and needle-nose pliers – which are not supplied. Refer to the included documentation and online resources for a complete inventory and to ensure all necessary components are present before beginning installation.

Installation Guide
Proper installation of the RTH8500D requires careful attention to wiring diagrams and secure mounting. Utilize the quick installation guide and necessary tools for success.
Tools Required for Installation
Before beginning the installation of your Honeywell RTH8500D thermostat, ensure you have the necessary tools readily available. A wire stripper is crucial for preparing the thermostat wires, allowing for clean and secure connections. Needle-nose pliers are also highly recommended, providing precision when manipulating wires within the thermostat base and wall.
Depending on your existing wiring setup, you might also need a small flathead screwdriver to tighten terminal screws. A level is essential for ensuring the thermostat is mounted straight, contributing to accurate temperature readings. Finally, a pencil is useful for marking wire locations and mounting holes. Having these tools prepared beforehand will streamline the installation process and minimize potential frustrations.
Wiring Diagram & Terminal Identification
Understanding the wiring diagram is paramount for a successful Honeywell RTH8500D installation. Carefully identify the existing wires connected to your old thermostat. Common terminals include Rh (power), Rc (power – often jumpered to Rh), W (heat), Y (cool), G (fan), and C (common – often required for touchscreen functionality).
The RTH8500D’s base will have corresponding terminal designations. Always refer to the specific wiring diagram included with your thermostat, as configurations can vary. Incorrect wiring can damage the thermostat or your HVAC system. If unsure, consult a qualified HVAC technician. Proper identification and secure connection of each wire are vital for optimal performance.
Mounting the Thermostat Base
Securely mounting the thermostat base is crucial for stable operation of your Honeywell RTH8500D. Begin by turning off power to your HVAC system at the breaker. Remove your old thermostat, carefully labeling the wires. Use the included mounting screws and wall anchors to attach the base plate to the wall, ensuring it’s level.
Feed the wires through the opening in the base. Verify that no bare wires are exposed to prevent shorts. Gently push any excess wire back into the wall. Once the base is firmly secured, you can proceed with connecting the wires to the appropriate terminals. Double-check all connections before restoring power.
Powering On and Initial Setup
After wiring, restore power to your HVAC system at the breaker. The Honeywell RTH8500D should power on, displaying the welcome screen. The thermostat will guide you through an initial setup process. This includes setting the date and time accurately, which is vital for scheduling functions.
You’ll be prompted to select your system type – furnace, heat pump, or electric baseboard. Choose the option that matches your home’s heating and cooling setup. The thermostat may also ask about fuel type. Follow the on-screen instructions carefully to ensure correct configuration for optimal performance.

Operating Instructions
The RTH8500D features a touchscreen interface for easy control. Users can adjust temperatures, program schedules, and access advanced features with intuitive navigation.
Navigating the Touchscreen Interface
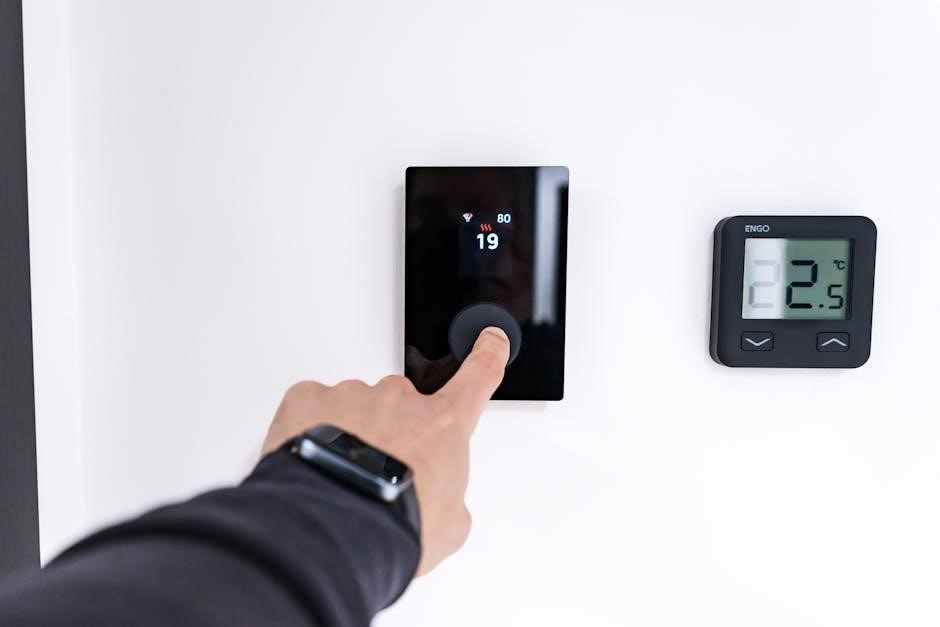
The Honeywell RTH8500D boasts a user-friendly touchscreen interface, designed for simple and intuitive operation. The main screen displays the current temperature, setpoint, and operating mode.
Tapping the screen reveals various options, including schedule settings, system configuration, and menu access. Swipe gestures allow for easy navigation between different screens and settings.
Icons clearly represent each function, such as heating, cooling, and fan control. A dedicated ‘Menu’ button provides access to advanced features like Smart Response and Vacation Mode.
The touchscreen is responsive and easy to read, even in low-light conditions. Users can customize the display brightness for optimal viewing. Familiarizing yourself with the touchscreen layout will ensure efficient thermostat control.
Setting the Date and Time
Accurate date and time settings are crucial for proper scheduling and thermostat operation. To set the date and time on your Honeywell RTH8500D, begin by accessing the main menu via the touchscreen.
Navigate to the “Date/Time” option, typically found within the system settings. You’ll be presented with separate fields for month, day, and year. Use the up and down arrows to adjust each value accordingly.
Similarly, adjust the hour and minute to reflect the current time. Ensure you select the correct AM or PM designation.
After entering the correct date and time, confirm your selections by pressing the “Save” or “Done” button. The thermostat will then utilize these settings for all scheduled programs and time-based functions.
Programming Schedules: 7-Day Configuration
The Honeywell RTH8500D excels with its 7-day programmable scheduling, allowing customized temperature settings for each day of the week. Access the “Schedule” option from the main menu to begin.
You can create unique schedules for weekdays and weekends, or program each day individually. Typically, you’ll define multiple “periods” per day – such as Wake, Leave, Return, and Sleep – each with a specific temperature setting.
Set the start time and desired temperature for each period. The thermostat seamlessly transitions between these periods, optimizing comfort and energy savings.
Review your schedule carefully and save your changes. You can easily copy a schedule from one day to another for convenience.
Understanding Heat and Cool Modes
The Honeywell RTH8500D thermostat offers distinct Heat and Cool modes, controlling your HVAC system accordingly. In “Heat” mode, the thermostat activates the heating system when the room temperature falls below the setpoint. Conversely, “Cool” mode engages the air conditioning when the temperature exceeds the setpoint.
An “Auto” mode intelligently switches between heating and cooling to maintain your desired temperature, based on indoor and outdoor conditions. The “Off” mode disables both heating and cooling.
Ensure the correct mode is selected for optimal comfort and efficiency. The current mode is clearly displayed on the touchscreen interface.
Proper mode selection prevents unnecessary energy consumption and ensures your system operates as intended.
Temporary and Permanent Holds
The Honeywell RTH8500D allows for both Temporary and Permanent Holds, overriding programmed schedules. A Temporary Hold maintains a specific temperature for a defined duration, reverting to the schedule afterward. This is ideal for short-term temperature adjustments.
To activate a Temporary Hold, adjust the temperature on the touchscreen and specify the hold duration. A Permanent Hold, however, indefinitely overrides the programmed schedule until manually canceled;
Use Permanent Holds for extended periods away or significant schedule changes. The thermostat clearly indicates when a Hold is active, displaying the held temperature and type.
Canceling a Hold restores the programmed schedule, ensuring consistent temperature control.

Advanced Features
Explore the RTH8500D’s Smart Response, Vacation Mode, and filter change reminders, enhancing comfort and efficiency. These features optimize performance and maintenance.
Smart Response Technology
Honeywell’s Smart Response technology is a key feature of the RTH8500D, designed to deliver heat or cool air faster than standard programmable thermostats. This innovative system learns the thermal characteristics of your home, anticipating how long it takes to reach a desired temperature.
Instead of simply turning on the heating or cooling system, Smart Response actively monitors the room temperature and adjusts the system’s operation to achieve the setpoint more quickly and efficiently. This means reduced wait times for comfort and potentially lower energy consumption. The thermostat intelligently adjusts to minimize temperature swings, providing a consistently comfortable environment. It’s a proactive approach to temperature control, optimizing for both speed and efficiency.
Vacation Mode Setup
The Honeywell RTH8500D’s Vacation Mode is ideal for energy savings when you’re away from home for extended periods. To activate, navigate to the main menu on the touchscreen and select “Vacation.” You’ll then be prompted to enter the start date and the duration of your trip.
During Vacation Mode, the thermostat maintains a pre-set temperature to prevent freezing pipes in winter or excessive heat buildup in summer. You can customize these hold temperatures for both heating and cooling. Upon your return, simply cancel Vacation Mode, and the thermostat will automatically resume your regular programmed schedule. This feature ensures comfort upon arrival while minimizing energy waste during your absence.
Filter Change Reminders
The Honeywell RTH8500D features a helpful filter change reminder to maintain optimal HVAC system performance. This reminder is crucial for air quality and efficiency. You can access the filter reminder settings through the thermostat’s main menu, typically under “Maintenance” or “Settings.”
The thermostat allows you to set a reminder based on time (e.g., every 30, 60, or 90 days) or runtime hours. When the reminder activates, an alert will appear on the touchscreen. Regularly changing your air filter ensures clean airflow, reduces strain on your HVAC system, and lowers energy consumption. Ignoring this reminder can lead to decreased efficiency and potential system damage.

Troubleshooting
This section details common issues with the RTH8500D, offering solutions and guidance for resolving problems. It also covers resetting to factory defaults.
Common Issues and Solutions
Display Problems: If the touchscreen is unresponsive, try resetting the thermostat. A blank screen often indicates a power issue; check wiring and the breaker. Connectivity Issues: For Wi-Fi models, ensure a stable internet connection and correct password entry. Re-pairing may be necessary.
Incorrect Temperature Readings: Verify the thermostat isn’t exposed to direct sunlight or drafts. Recalibrate if needed; Heating/Cooling Not Responding: Confirm the system switch is in the correct mode (Heat, Cool, or Auto). Check wiring connections at the thermostat and the HVAC unit.
Schedule Errors: Double-check programmed schedules for accuracy. Temporary holds can override schedules; ensure they are released when no longer needed. Filter Reminders: The thermostat may display a reminder; replace the air filter as recommended for optimal performance.
Resetting the Thermostat to Factory Defaults
Caution: Resetting to factory defaults will erase all personalized settings, including schedules, preferences, and Wi-Fi connections. This process returns the thermostat to its original, out-of-the-box state.
Procedure: Access the thermostat’s menu via the touchscreen interface. Navigate to “Settings” or “Advanced” options. Locate the “Reset” or “Factory Reset” function. Confirm your decision when prompted, as this action is irreversible without manual reconfiguration.
Post-Reset: After the reset, the thermostat will guide you through the initial setup process, including date, time, and system configuration. You’ll need to re-establish any Wi-Fi connections and reprogram your desired heating and cooling schedules. Refer to the “Powering On and Initial Setup” section for detailed instructions.

Resources & Support
For comprehensive assistance, download the full PDF user manual or contact Honeywell support directly. Links and contact information are readily available online.
Downloading the Full User Manual (PDF)
Accessing the complete Honeywell RTH8500D user manual in PDF format is straightforward. ManualsLib provides a readily available online version for convenient viewing and download. This comprehensive document details every aspect of your thermostat, from initial setup and programming to advanced features and troubleshooting steps.
The PDF manual offers a searchable format, allowing you to quickly locate specific information related to your needs. It’s an invaluable resource for understanding all the capabilities of your RTH8500D, ensuring optimal performance and energy savings. Downloading the manual allows offline access, making it available whenever and wherever you require assistance. You can find it easily through a quick online search for “Honeywell RTH8500D manual PDF”.
Honeywell Support Contact Information
For direct assistance with your Honeywell RTH8500D thermostat, Honeywell offers various support channels. While specific contact details may vary, their official website is the primary resource for finding up-to-date information. You can typically locate a support section with FAQs, troubleshooting guides, and contact forms.

Direct phone support is often available, allowing you to speak with a Honeywell representative for personalized assistance. Online chat support may also be offered for quick answers to common questions. Remember to have your thermostat model number (RTH8500D) readily available when contacting support to expedite the process. Visiting the Honeywell Home website will provide the most accurate and current contact options.